Most American car owners underestimate how much a thorough detailing can transform their vehicle. Studies show that regular detailing can extend a car’s finish and resale value by as much as 15 percent. With the right approach, even beginners can achieve a level of shine and protection that rivals professional results. This guide walks you through each crucial step so your car stands out on any American road.
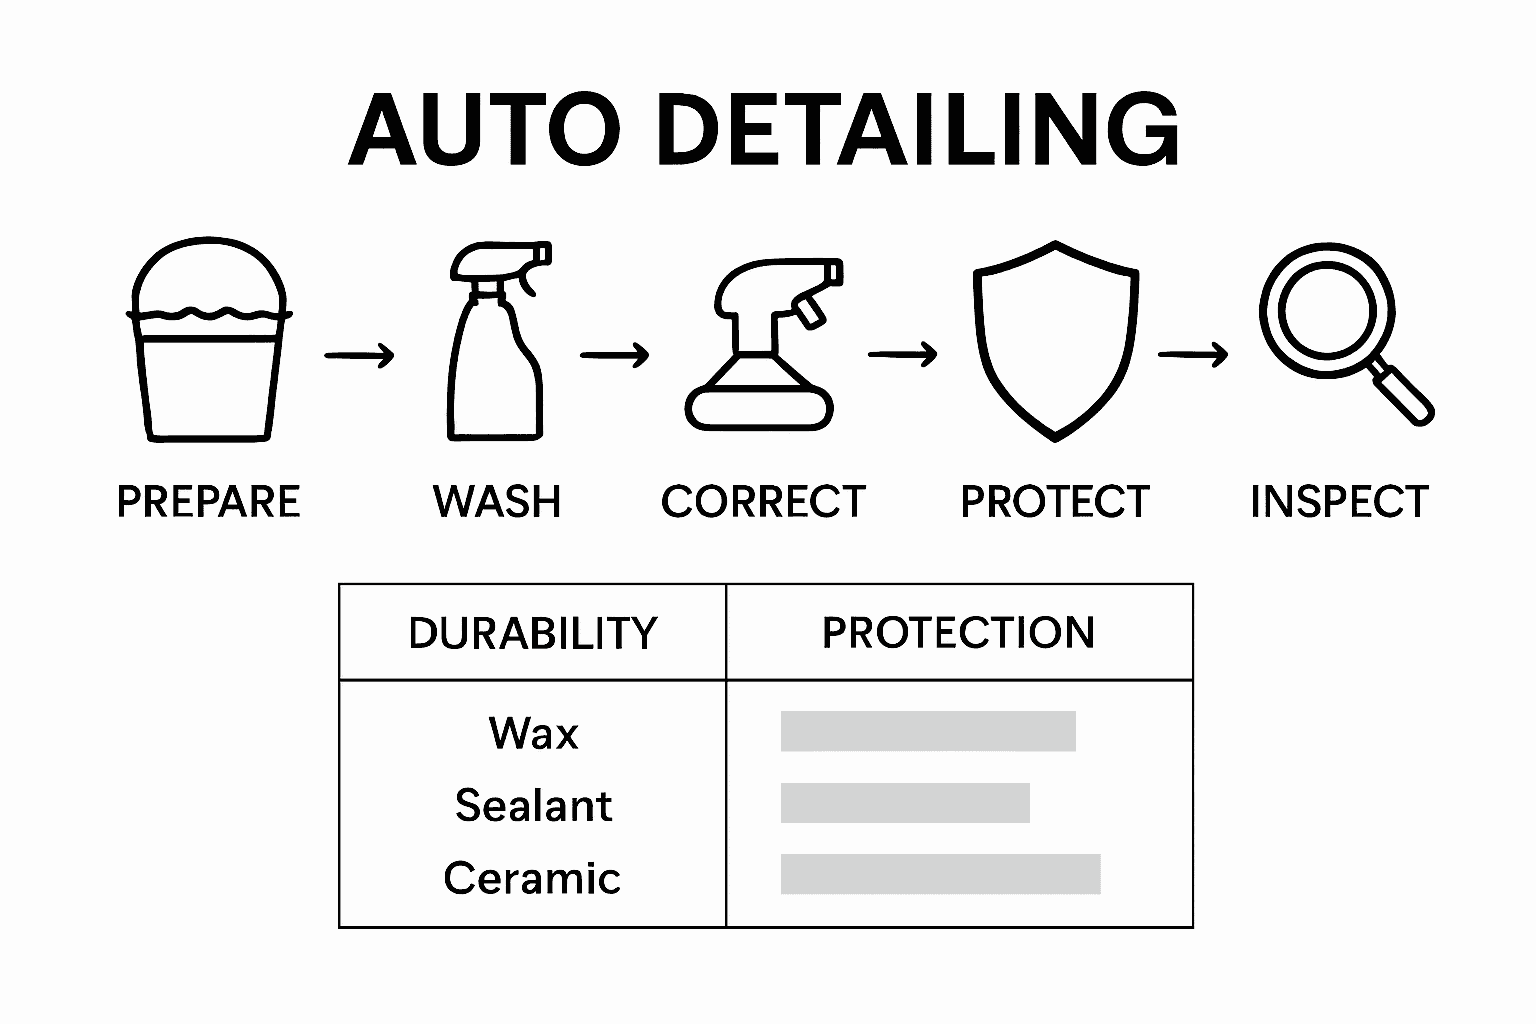
Auto Detailing Step-by-Step Process Overview
- Step 1: Prepare The Vehicle And Gather Supplies
- Step 2: Wash And Decontaminate All Surfaces
- Step 3: Correct And Polish Paintwork
- Step 4: Protect With Quality Sealants Or Coatings
- Step 5: Inspect And Perfect Final Results
Quick Summary
| Essential Insight | Detailed Explanation |
|---|---|
| 1. Gather Essential Supplies | Create a kit with microfiber towels, mitts, and specialized tools for effective detailing. |
| 2. Perform a Thorough Wash | Use a pre-wash method and a two-bucket system to remove dirt and contaminants safely. |
| 3. Inspect and Correct Paint | Identify imperfections and use proper polishing techniques to achieve a flawless finish. |
| 4. Apply Protective Coatings | Choose between wax, sealants, or ceramic coatings based on desired durability and protection. |
| 5. Conduct a Final Inspection | Check for missed spots and ensure the entire vehicle meets professional detailing standards. |
Step 1: Prepare the Vehicle and Gather Supplies
Before diving into your auto detailing journey, gathering the right tools and preparing your vehicle sets the foundation for a professional quality result. The National Kidney Foundation recommends assembling critical supplies that will transform your ordinary car wash into an exceptional detailing experience.
Start by creating a comprehensive supplies kit that includes microfiber towels, wash mitts, multiple clean buckets, automotive soap, clay bars, wax or polish, detailing brushes, and clean towels. As recommended by the University of Central Florida’s Auto Detailing Guide, having a variety of specialized tools will help you address different surfaces and intricate areas of your vehicle. Choose high-quality microfiber towels that won’t scratch your paint and opt for soft wash mitts to prevent swirl marks during the cleaning process.
Position your vehicle in a shaded area with enough space to move around comfortably. Remove personal items, trash, and check floor mats for thorough cleaning. This preparation ensures you can work systematically and efficiently without interruptions.
Pro tip: Organize your detailing supplies in a portable caddy or toolbox to keep everything accessible and prevent misplacing small items during the detailing process.
Step 2: Wash and Decontaminate All Surfaces
Removing dirt, grime, and embedded contaminants is crucial for achieving a pristine finish and protecting your vehicle’s paint. Pre-washing techniques help loosen stubborn dirt and minimize the risk of scratching during the main wash, setting the stage for a professional detailing process.
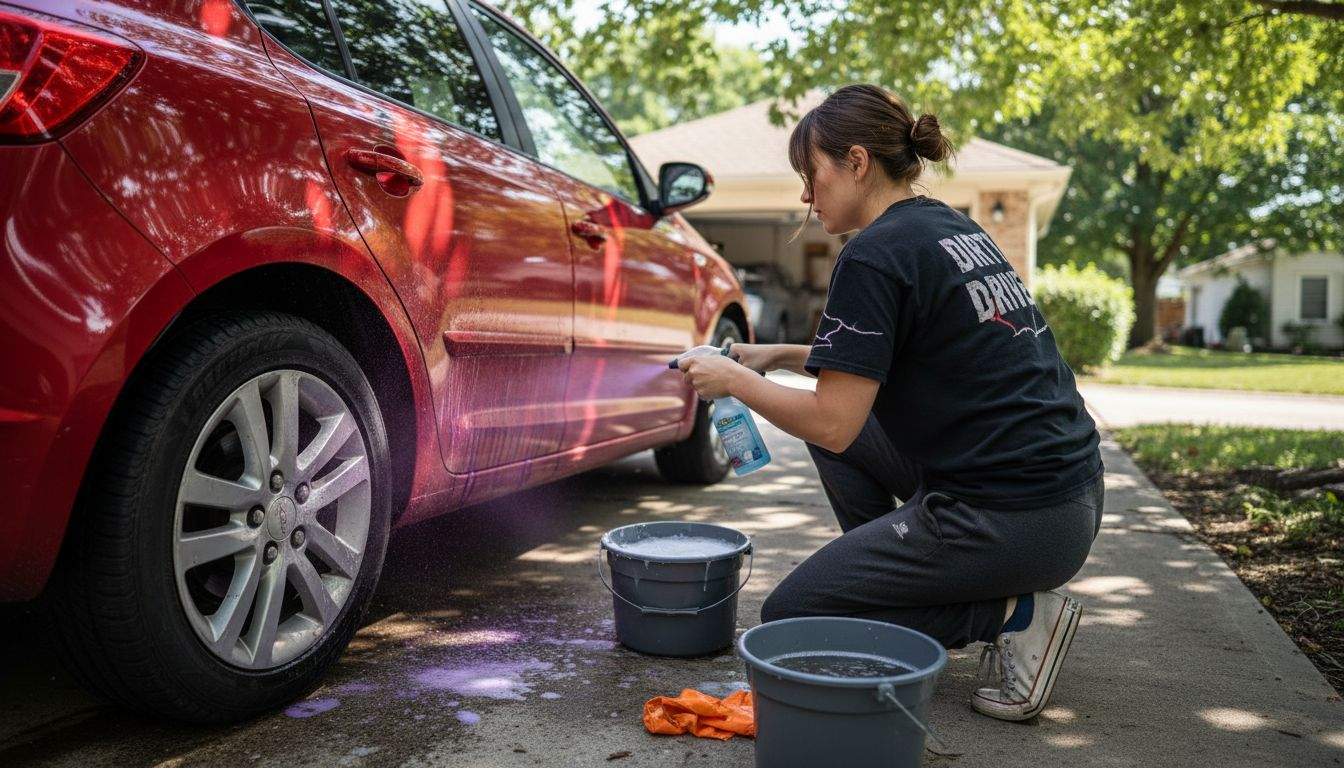
Begin with a thorough pre-wash using snow foam or a hand foamer to break down initial layers of dirt and road grime. Spray the entire vehicle generously, allowing the foam to dwell for several minutes to soften and lift contaminants. The decontamination process goes beyond standard washing by targeting specific particles like iron deposits and tar that regular cleaning methods cannot eliminate. Use a dedicated iron remover spray to dissolve metal particles that can embed in your vehicle’s paint surface, causing potential damage over time.
After the pre-wash and iron removal, proceed with a two bucket wash method using clean microfiber mitts and automotive shampoo. Work from the top down, rinsing your mitt frequently to prevent dirt transfer and potential scratching. Pay special attention to typically neglected areas like wheel wells, lower panels, and around trim pieces.
Pro tip: Always use separate wash mitts for different vehicle sections (body, wheels, lower panels) to prevent cross contamination and protect your vehicle’s delicate surfaces.
Step 3: Correct and Polish Paintwork
The National Kidney Foundation recommends selecting appropriate compounds and buffing pads to transform your vehicle’s paint from dull to brilliant. Paint correction is an intricate process that removes surface imperfections like swirl marks, light scratches, and oxidation to reveal a stunning finish.
Begin by thoroughly inspecting your vehicle’s paint in bright, natural light to identify areas needing correction. Select a dual action polisher with multiple pad options matching different correction levels. Start with the least aggressive compound and pad combination, working in small sections using slow overlapping passes. Polishing techniques recommended by the University of Central Florida emphasize systematic approaches to enhance paint appearance and remove surface defects without causing additional damage.
Apply polishing compounds in thin, even layers using moderate pressure and consistent movement. Work in 2×2 foot sections, using microfiber towels to remove excess compound and inspect your progress frequently. Different paint colors and clear coat conditions may require adjusting your technique and selecting specific polishing products that match your vehicle’s unique characteristics.
Pro tip: Always test your polishing technique on a small, inconspicuous area first to ensure you achieve the desired results without causing unintended paint damage.
Step 4: Protect with Quality Sealants or Coatings
The National Kidney Foundation emphasizes the critical importance of applying protective sealants to shield your vehicle’s pristine paint from environmental challenges like UV rays, road grime, and oxidation. Selecting the right protective coating will determine how long your meticulous detailing work maintains its showroom shine.
Proper preparation is key when applying ceramic coatings or sealants, as recommended by automotive experts. Begin by ensuring your vehicle’s surface is completely clean, smooth, and free of any residual polishing compounds. Choose between traditional carnauba wax, synthetic sealants, or advanced ceramic coatings based on your specific protection needs and desired durability. Ceramic coatings offer superior long term protection and hydrophobic properties, while traditional waxes provide a classic shine with shorter term benefits.
Apply your chosen protective coating using soft microfiber applicator pads, working in thin, even layers and allowing proper curing time between applications. Work in small sections, using straight line movements to ensure uniform coverage. Pay extra attention to high exposure areas like the hood, roof, and front panels that experience more environmental stress.
Pro tip: Always work in a controlled environment with moderate temperatures and low humidity to ensure optimal bonding and longevity of your protective coating.
Here’s a comparison of popular protective coatings for your vehicle:
| Coating Type | Durability | Protection Features | Maintenance Level |
|---|---|---|---|
| Carnauba Wax | 2-3 months | Glossy finish, UV protection | Frequent reapplication |
| Synthetic Sealant | 4-6 months | Enhanced durability, water beading | Moderate upkeep |
| Ceramic Coating | 2+ years | Superior scratch and chemical resistance | Low, routine washes |
Step 5: Inspect and Perfect Final Results
The National Kidney Foundation recommends a comprehensive final inspection to ensure every inch of your vehicle meets professional detailing standards. This crucial step transforms your hard work into a truly showroom ready finish that will make you proud of your meticulous effort.
Automotive experts emphasize systematic final checking techniques to address any overlooked imperfections. Begin by examining your vehicle under bright, natural lighting from multiple angles to reveal subtle paint inconsistencies, missed spots, or remaining surface imperfections. Use a bright LED light or direct sunlight to highlight areas that might have been missed during previous detailing stages. Check exterior surfaces methodically starting from the top panels downward and moving around the entire vehicle perimeter.
Pay special attention to trim areas, panel gaps, and hard to reach spots that often get overlooked. Touch up any remaining minor imperfections with precise spot treatments or additional light polishing. Verify that your protective coating has been applied uniformly and inspect windows, wheels, and intricate surface details to guarantee a comprehensive finish.
The following table summarizes key inspection checkpoints during final detailing:
| Area | What to Inspect | Why It Matters |
|---|---|---|
| Paintwork | Surface clarity, missed spots | Ensures consistent shine |
| Trim & Gaps | Residue, debris, even coating | Maintains visual uniformity |
| Glass & Mirrors | Streaks, water spots | Improves visibility and polish |
| Wheels & Tires | Remaining dirt, dressing coverage | Completes overall appearance |
Pro tip: Take digital photos of your completed detail work in natural light to objectively assess your results and identify any areas needing final touch ups.
Achieve Immaculate Auto Detailing Results with VIVE AUTO STYLING
The detailed process of washing, correcting, and protecting your vehicle’s paint requires expert knowledge and careful technique to avoid costly mistakes and ensure lasting shine. If you want to go beyond DIY and safeguard your investment with advanced solutions like professional ceramic coatings and paint protection film our team at VIVE AUTO STYLING is here to help. We understand the importance of thorough cleaning, precise paint correction, and applying high quality sealants for durable protection against UV damage, scratches, and daily wear.
Experience the confidence of a showroom finish without the hassle. Trust our specialists in Casper, Mills, and Evansville Wyoming to elevate your vehicle’s appearance and protect its value through tailored luxury auto detailing and protective services. Take the first step toward impeccable care today by visiting VIVE AUTO STYLING and discover how professional craftsmanship makes all the difference.
Frequently Asked Questions
What supplies do I need for auto detailing?
To perform effective auto detailing, gather a few essential supplies including microfiber towels, wash mitts, buckets, automotive soap, clay bars, wax or polish, detailing brushes, and clean towels. Start by setting up a portable caddy to keep your supplies organized and accessible as you work through the detailing process.
How do I properly wash and decontaminate my vehicle?
Begin the washing process with a pre-wash using snow foam to loosen dirt. Follow this by using the two-bucket wash method with automotive shampoo, making sure to rinse your wash mitt frequently to prevent scratches, and pay special attention to hard-to-reach areas like wheel wells and lower panels.
What is paint correction and how do I perform it?
Paint correction involves removing surface imperfections like swirl marks and light scratches to improve your vehicle’s appearance. Inspect your paint in bright light, then use a dual-action polisher with an appropriate compound for your vehicle. Work in small sections until you achieve the desired polish.
How can I protect my vehicle’s paint after detailing?
To protect your vehicle’s paint, apply a quality sealant or ceramic coating after thorough preparation. Choose your protective product based on your needs and apply it in thin, even layers using microfiber applicator pads, ensuring you allow proper curing time.
How do I conduct a final inspection of my detailing work?
Perform a final inspection under natural lighting to identify any missed spots or imperfections. Check paint surfaces, trim areas, and windows systematically, making touch-ups as needed to ensure a consistent, immaculate finish before completing the detailing process.